 Fig. 1. Theme contents on the example
of the Theme 3 "Dative case"
Fig. 1. Theme contents on the example
of the Theme 3 "Dative case"
Dear users, this is the Russian
language test application and you
can use it to improve your ability
to put into practice the Russian
language noun cases.
Here you can find 5 themes
devoted to the Russian Language noun cases:
| Тема 1 | «Родительный падеж» |
| Тема 2 | «Винительный падеж» |
| Тема 3 | «Дательный падеж» |
| Тема 4 | «Творительный падеж» |
| Тема 5 | «Предложный падеж» |
Each theme has two sections – Option 1 and Option 2 (see Fig. 1 below).
Fig. 1. Theme contents on the example
of the Theme 3 "Dative case"
As a matter of fact, in the theme 3 (Dative Case) there are two test sections (Option 1 and Option 2), each of which contains 50 test tasks for this case (100 tasks for the entire theme). However, for example, in the theme 1 (Genitive Case) there are also two test sections, but 80 tasks in each (160 tasks in total).
Each theme option contains 2 sections. One section is intended for training students in doing test tasks, the other is for testing the student’s knowledge by the teacher. Therefore, one section is called “Test tasks without taking into account the time” («Тестовые задания без учёта времени») and is intended for student training. Another section is called “Test tasks taking into account the time and individual data” («Тестовые задания с учётом времени и индивидуальных данных») of a student, and is intended for testing students by a teacher (see Fig. 2 below).
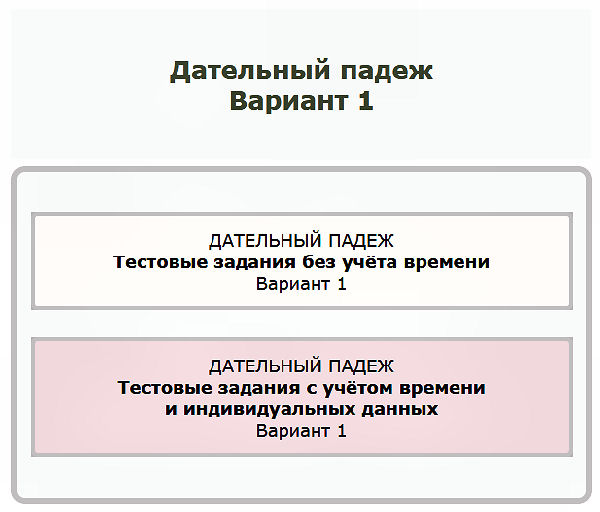 Fig. 2. You can see the theme
content option on the example
of Theme 3 "Dative case" Option 1
Fig. 2. You can see the theme
content option on the example
of Theme 3 "Dative case" Option 1
Thus, in this application there are two types of test sections – 80 and 50 tasks each. If there are 80 tasks in the section, you have 50 minutes to execute the entire set of tasks. If there are 50 tasks in the test section, you have 30 minutes to execute. In both cases, you have about 40 seconds to execute each task.
Before going to the test sections, refresh the lessons that are devoted to the theory of the sections that you are going to perform. For example, if you want to go through the «Дательный падеж» (Dative case") theme, refresh the theory of this case first. This approach will make it easier for you to pass test tasks, speed up the process of their execution.
To begin with any test section,
you must have:
- a smartphone or computer device
with Internet access;
- a folder in your device to store test results;
- a copybook or notebook;
- a pen;
Write down
the date, time and title
of the test section
in the notebook, and then go to its execution.
For example:
2 марта 2023г.
Дательный падеж
Вариант 1
Время начала:
10ч. 8м. (time stamp)
After making the entry, you can immediately start performing a training option section. For this purpose, you just need to enter the appropriate option section and start performing test exercises.
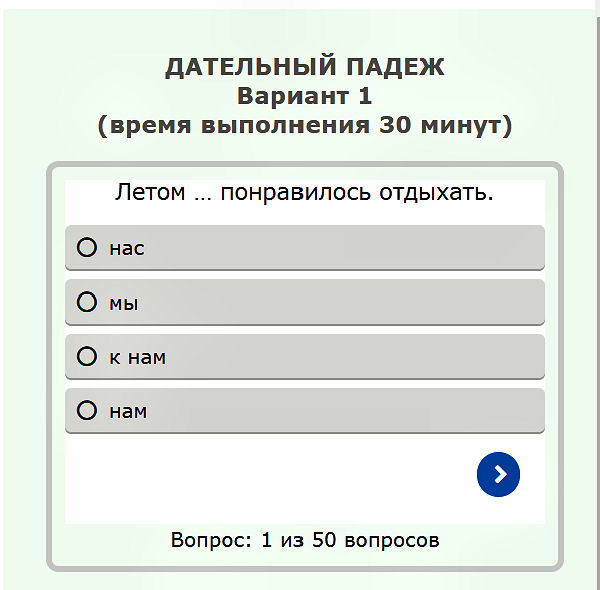 Fig. 3. This is the example of the
beginning the training test
section "Dative Case", Option 1 («Дательный
падеж», Вариант 1).
Fig. 3. This is the example of the
beginning the training test
section "Dative Case", Option 1 («Дательный
падеж», Вариант 1).
If you have selected
the section "Test option
taking into account
the time and individual
data" and a corresponding
entry has been made
in your notebook, then,
going to this section,
you can see the following
elements of the visual control:
- countdown timer;
- the current date and time stamp;
- a field for entering the student first and last name and the "Enter" button.
As soon as you have come to the test execution, the countdown timer starts automatically. The current date is visible below, and the «Имя_Фамилия:» (“First and Last name”) text field appears in the lower position. It is required to enter the first and last name of the student performing the work. Please note that the test part of the interface is not yet available (see Fig.4). It will appear later, after entering the first and last name and pressing the "Enter" button.
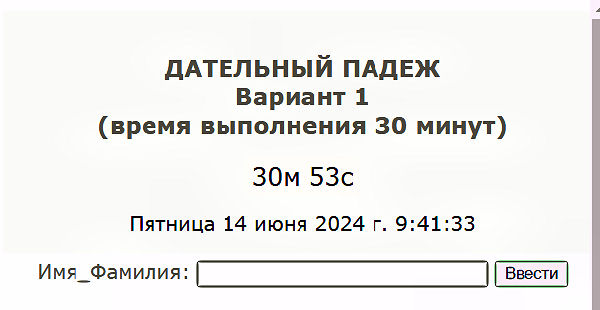 Fig. 4. Visual control elements have appeared
In the below Fig. 5 the «Иван Петров» first and last name is entered:
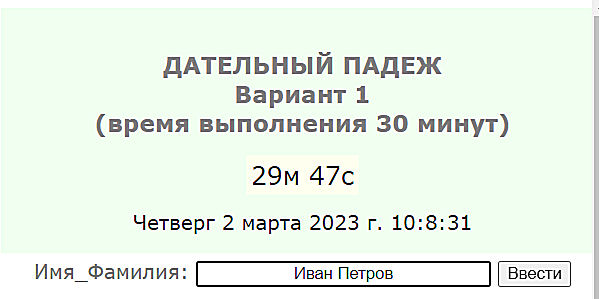 Fig. 5. The first and last name has been entered
Next, you need to click
the "Enter" button,
after which the button
disappears and the text
field stops being edited,
the interface test part
appears available to
the user (see Fig. 6).
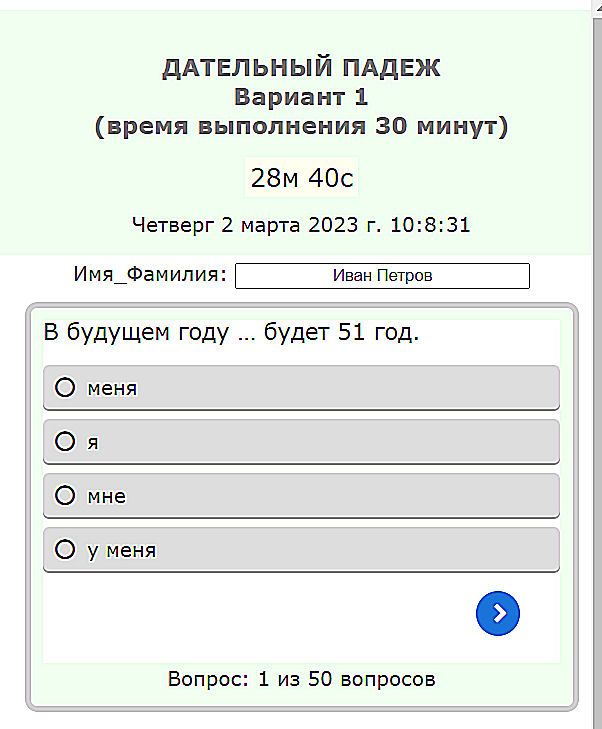 Fig. 6. The "Enter" button
is pressed and hidden. It is by
the absence of the button
that you can understand that
the text field is not editable
Fig. 6. The "Enter" button
is pressed and hidden. It is by
the absence of the button
that you can understand that
the text field is not editable
After that, start doing the test tasks. At each moment, the timer shows the time to the end of the work process. However, do not wait for the timer to expire, then it will be too late to finish. It is necessary to finish at least a few minutes before the time end.
Please note!
If you have reached and
completed the last (150th or 50th)
task, but have not seen
the blue "Finish" («Завершить») button,
see Fig. 7 below:
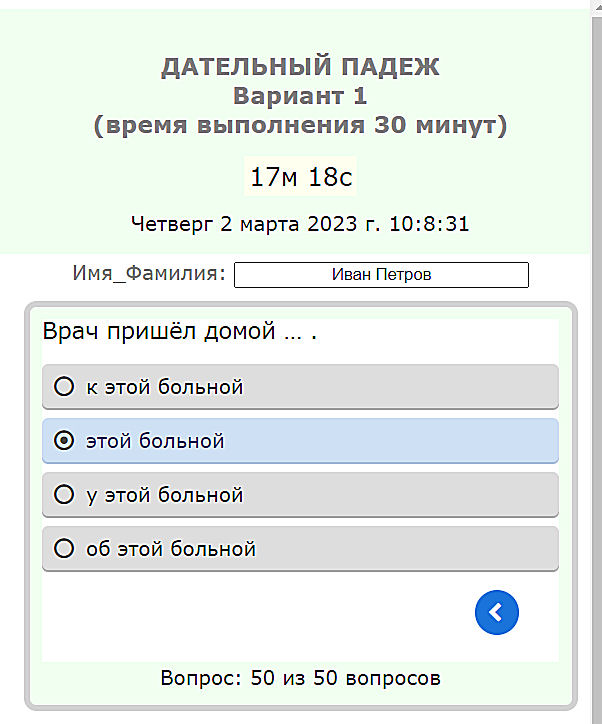 Fig. 7. A failed finishing example of the test option
In this case, you cannot
complete the execution of
the test option section.
What should the correct
completion be look like?
The correct completion is
shown in the Fig. 8, where
there is a "Finish"
(«Завершить») button.
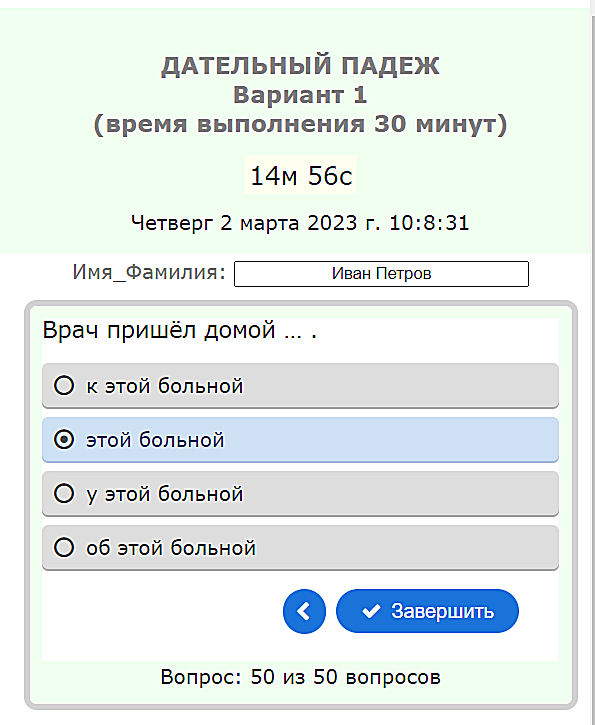 Fig. 8. A successful completion
example of the test section option
Fig. 8. A successful completion
example of the test section option
What does the absence of the "Finish" («Завершить») button mean?
The absence of this button means that
you missed completing one or more tasks!
Go back, find the missed tasks, complete
them and return to the end, i.e. to
the 150th or 50th task. Click the
"Finish" button that appears.
Clicking this button takes you to
the window where you can see
the results of your work.
Please note, that after
clicking the "Finish" button,
the countdown time stops!
What does the absence of the "Finish" («Завершить») button mean?
This fact means that you have missed
executing one or more tasks!
Go back, find the missed tasks,
execute them and then return
to the end, i.e. to the 80th
or 50th task and click the «Завершить»
button that has appeared.
As soon as you have clicked
the «Завершить» ("Finish") button,
take a screen-shot
of the application window.
Save this image
into the folder you have appointed.
Open the screen-shot and write down the time of
your finish, the rating
and the number of correctly
completed tasks (see Figure 9 below):
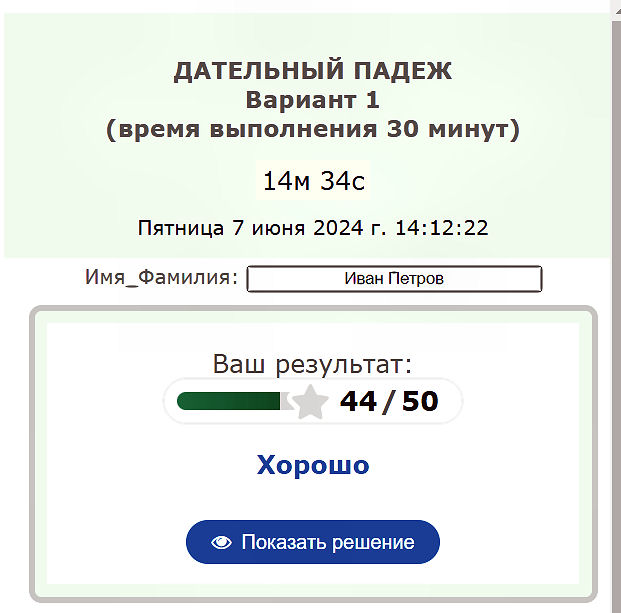 Fig. 9. Here you can see
the example of the test
section result
Fig. 9. Here you can see
the example of the test
section result
The entry example in a notebook
for the test section result
in Fig. 9, you can see it below:
(continued recording in your notebook)
Время окончания:
15м 13с.
Оценка:
Хорошо;
Результат:
43 из 50;
Ошибки:
-- -- --
In the Fig. 9 you can see the example
of the correct finishing the test section:
- there is some time reserve in the countdown timer;
- the date corresponds to the test section execution date;
- there is a student's first and last name.
If any of the three above conditions are not met,
the teacher can rate your result as “Unsatisfactory”,
despite the fact that student's actions
have "Good" rating (Fig. 9).
For example, in the figure below you can see the situation when the allotted time for work (30 minutes) is over and the result of the work has the "unsatisfactory" rating (see Fig. 10). In Fig. 10, in the countdown timer, instead of time figures, you see the following text: "Time > 30 minutes", in other words, the time is overdue and the overall rating of the work is "unsatisfactory".
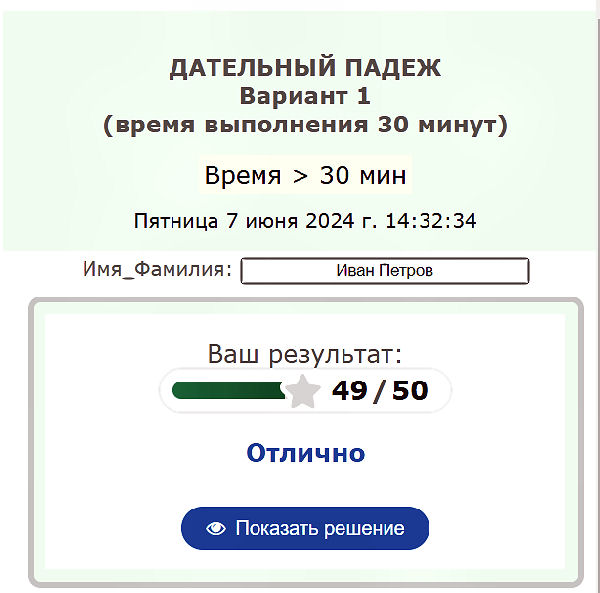 Fig. 10. The example of overdue
time for this test section
Fig. 10. The example of overdue
time for this test section
Click on the "Show solution" («Показать решение») button, find your mistakes, write them down and analyze them later. You can also look up words in the dictionary and analyze your actions while doing tasks.
For the user, the analysis of mistakes and the result is an extremely important point regardless of the time limit. The speed of testing improves along with regular training. Therefore, you should not be afraid to get an "unsatisfactory" rating because of the time limit overdue, but you should make every effort for further training in order to cope with the testing faster and increase your speed.
Analyze records of results in your notebook; compare your results for different dates and times. Identify weaknesses in your knowledge of the cases. Periodically contact teachers if you have any questions. This work will allow you to speed up mastering the Russian language noun cases and successfully use them in practice.
Enjoy our application!